Node.js Tutorial
Hello, and welcome. In this tutorial, we will explore the features of Node.js. Our ultimate goal is to have a reasonably well-developed framework from which we can build all sorts of cool things throughout the semester.
The first step, of course, is that you'll need a 'sane' working environment. I assume that you are comfortable with using git in a single-user or small-team mode (i.e., branching is uncommon), and that you know how to use bash, a web browser, and the Java and C++ programming languages with the editor or IDE of your choice.
To this environment, we're going to add Node.js. You should be able to find and install it using the directions that are appropriate for your OS. I'm going to assume that you're either in Linux, or else you're typing all commands from the git bash prompt in Windows. To test your environment, try to re-create the following node session. Note that "^d" means that you hold down the ctrl key and press the letter "d", and that "$" indicates a shell prompt, whereas ">" indicates a prompt from the node interpreter.
$ node
> 5 + 6
11
^D
$
While that might have seemed underwhelming, it was enough to show that (a) your Node.js installation is correct, and (b) you can use node as an interpreter for quick command-line scripting.
Let's start with an extremely simple site. Create a file called "server.js", and type the following text into it:
// create an HTTP object, for responding to requests
var http = require('http');
// server will run the given function on every request
var server = http.createServer(function (request, response) {
    // the server will reply to any request, for any resource, by sending a
    // text file
    response.writeHead(200, {'Content-Type': 'text/plain'});
    // add some text to the response text file, and then end the file
    response.end('Hello World\n');
});
// instruct the server to run on port 9000
server.listen(9000);
// status message, so we know the server is running
console.log('Server running at http://localhost:9000');
Now let's test it. Open up a command prompt, go to the folder where you've saved server.js, and type the following:
node server.jsYou should see the following response:
Server running at http://localhost:9000Open your web browser, and navigate to http://localhost:9000. You should see something like this:
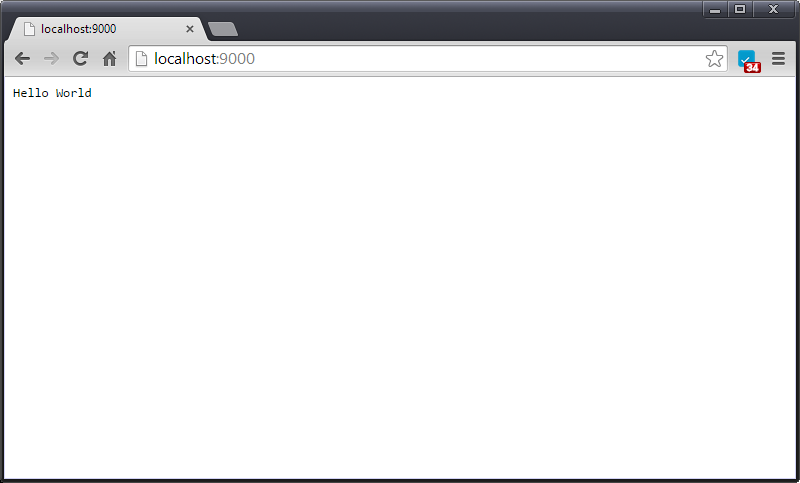
You can open as many pages as you'd like, and you can give any address you'd like, but no matter what resource you request, you'll always get the same page. That's going to get pretty dull, so let's stop this server, and try something new. To stop your server, return to the command prompt, and type ctrl-c.
In Node.js, the different paths that your webserver understands are known as "routes". Let's create three routes to demonstrate how routes work. The first will be for the main page ("/"), the second will be for the "hello" route, and the third route will print an error message for any other resource that is requested.
To set up this server, create a new server.js file, and enter the following code:
// create an HTTP object, for responding to requests
var http = require('http');
// server will run the given function on every request
var server = http.createServer(function (request, response) {
    // handle the "/" resource by calling do_main()
    if (request.url === '/') {
        do_main(request, response);
    }
    // handle the "/hello" resource by calling do_hello()
    else if (request.url === '/hello') {
        do_hello(request, response);
    }
    // handle all other requests by calling do_error()
    else {
        do_error(request, response);
    }
});
// instruct the server to run on port 9000
server.listen(9000);
// status message, so we know the server is running
console.log('Server running at http://localhost:9000');

// our main route is just a text file that gives a welcome message
function do_main(request, response) {
    response.writeHead(200, {'Content-Type': 'text/plain'});
    response.end('Welcome to my Node.js website.  Only the "hello" route is supported right now.\n');
}

// our hello route should be familiar...
function do_hello(request, response) {
    response.writeHead(200, {'Content-Type': 'text/plain'});
    response.end('Hello World\n');
}

// our error route will give a standard 404 error
function do_error(request, response) {
    response.writeHead(404, {'Content-Type': 'text/plain'});
    response.end('404: file not found\n');
}
That code should be pretty easy to understand. Note, though, that our paths are very particular. To test this, you should type:
node server.jsThen use your browser to visit (at a minimum) the following pages:
- http://localhost:9000
- http://localhost:9000/hello
- http://localhost:9000/secret
Those all look good... but consider what happens when you visit http://localhost:9000/hello/. Something isn't quite right yet...
No web site generates 100% of the content it serves. At the very least, images, css files, and client-side js files are all likely to be constant across sessions, if not across users. So let's go ahead and add some simple static file serving.
Remember that the Node.js ecosystem provides more than just a web server. To demonstrate the usefulness of Node.js, let's write a script that uses the http protocol to download a hard-coded url path and save it as a file.
Here's our script. Save it as "getFile.js":
// create http and filesystem objects
var http = require('http');
var fs = require('fs');
// open a file for writing
var file = fs.createWriteStream("LU.png");
// use HTTP to GET the Lehigh logo, and pipe the result to our file
var request = http.get("http://www.cse.lehigh.edu/~spear/LU.png",
                       function(response) {
                           response.pipe(file);
                       });
Run it:
node getFile.jsYou should now see LU.png in the folder where you were when you ran the script.
Now let's serve up the static file. In the same folder where you saved LU.png, write the following code:
// create an HTTP object, for responding to requests
var http = require('http');
// server will run the given function on every request
var server = http.createServer(function (request, response) {
    // handle the "/" resource by calling do_main()
    if (request.url === '/') {
        do_main(request, response);
    }
    // handle the "/hello" resource by calling do_hello()
    else if (request.url === '/hello') {
        do_hello(request, response);
    }
    // handle requests for the logo
    else if (request.url === "/logo") {
        do_logo(request, response);
    }
    // handle all other requests by calling do_error()
    else {
        do_error(request, response);
    }
});
// instruct the server to run on port 9000
server.listen(9000);
// status message, so we know the server is running
console.log('Server running at http://localhost:9000');

// our main route is just a text file that gives a welcome message
function do_main(request, response) {
    response.writeHead(200, {'Content-Type': 'text/plain'});
    response.end('Welcome to my Node.js website.  Only the "hello" route is supported right now.\n');
}

// our hello route should be familiar...
function do_hello(request, response) {
    response.writeHead(200, {'Content-Type': 'text/plain'});
    response.end('Hello World\n');
}

// our error route will give a standard 404 error
function do_error(request, response) {
    response.writeHead(404, {'Content-Type': 'text/plain'});
    response.end('404: file not found\n');
}

// to handle requests for the logo, we'll need a filesystem object
var fs = require('fs');
// then we can just read the file and pipe it to the response
function do_logo(request, response) {
    // don't forget to provide a valid html header for this file type
    response.writeHead(200, {'Content-Type': 'img/png'});
    fs.createReadStream('./LU.png').pipe(response);
}
To test this, point your browser to http://localhost:9000/logo. A download of the LU.png file should start.
In our previous code, we manually routed "/logo" to "/LU.png". It's not going to be very efficient to set up manual routes for all of those files. Instead, let's create a "public" folder, and serve files out of it, by name. Start by making the folder, and moving "LU.png" into it. Then write the following code. This code isn't very tricky, given what you've done so far:
// create an HTTP object, for responding to requests
var http = require('http');

// create the objects we'll need for doing our improved file routing
var fs = require('fs');
var parse = require('url').parse;
var join = require('path').join;
var root = __dirname + "/public/"; // relative to this script

// server will run the given function on every request
var server = http.createServer(function (request, response) {
    // handle the "/" resource by calling do_main()
    if (request.url === '/') {
        do_main(request, response);
    }
    // handle the "/hello" resource by calling do_hello()
    else if (request.url === '/hello') {
        do_hello(request, response);
    }
    // handle requests for everything else
    else {
        do_fileRequest(request, response);
    }
});
// instruct the server to run on port 9000
server.listen(9000);
// status message, so we know the server is running
console.log('Server running at http://localhost:9000');

// our main route is just a text file that gives a welcome message
function do_main(request, response) {
    response.writeHead(200, {'Content-Type': 'text/plain'});
    response.end('Welcome to my Node.js website.  Only the "hello" route is supported right now.\n');
}

// our hello route should be familiar...
function do_hello(request, response) {
    response.writeHead(200, {'Content-Type': 'text/plain'});
    response.end('Hello World\n');
}

// on any file request, parse the request, transform it into a file path, and
// serve the file
function do_fileRequest(request, response) {
    var url = parse(request.url);
    var path = join(root, url.pathname);
    var stream = fs.createReadStream(path);
    stream.pipe(response);
}
There are a few nice things to notice here. First, you'll see that we made the path to the public folder a relative path, where it is based on the path to the file we're running. That means that the folder you are in when you run server.js doesn't matter... the folder where server.js is determines where public/LU.png is. Second, notice that we're serving out of the public folder, but we're serving without the prefix "public". You should be able to get to LU.png by simply visiting http://localhost:9000/LU.png.
Unfortunately, when you go to locations that don't have corresponding files, the entire Node.js instance crashes. Let's make a few changes to prevent this sort of error. Specifically, we'll change do_fileRequest(), and we'll bring back a slightly improved version of do_error():
// on any file request, parse the request, transform it into a file path, and
// serve the file
function do_fileRequest(request, response) {
    var url = parse(request.url);
    var path = join(root, url.pathname);
    var stream = fs.createReadStream(path);
    stream.pipe(response);
    stream.on('error', function(err) {
        do_error(request, response);
    });
}

// on any error, print a 404 message, and give the name of the resource that
// was not found:
function do_error(request, response) {
    response.writeHead(200, {'Content-Type': 'text/plain'});
    response.end('404: ' + request.url + ' not found\n');
}
Now visiting non-existent pages will not cause the entire web site to crash.
It's going to get out of hand to put all of our code into one file. Fortunately, we can split our functionality into many files. Let's try it with a new route for "bye". First, create a file called "bye.js":
// by default, variables and functions in side of this file are not visible
// to other js files.  The exception is that we can add fields to the
// 'exports' object, and they will be visible.  Let's export a function
// called "bye", which prints a simple message:
exports.bye = function(request, response) {
    response.writeHead(200, {'Content-Type': 'text/plain'});
    response.end('See you later :)\n');
}
To access the code, create an object from it like this:
// an object we wrote
var bye = require('./bye');
Then create a route to it in your server:
    // handle /bye
    else if (request.url === '/bye') {
        bye.bye(request, response);
    }
Be sure to put this route before the route for handling static content!
Up to this point, the server has been completely stateless... it hasn't remembered anything about any request it received. Let's create a new route that counts visits to itself. First, create a new file called counter.js:
// create a counter, initialized to zero
var myCount = 0;

// increment the counter, and generate an HTML page to display the counter.
function do_count(request, response) {
    myCount++;
    var html = '<html><head><title>Your Number</title></head>'
        +'<body>'
        +'<h1>Your unique, special, one of a kind number appears below</h1>'
        + '<p>' + myCount + '</p>'
        +'</body>'
        +'</html>';
    response.writeHead(200, {'Content-Type': 'text/html; charset="utf-8"',
                             'Content-Length': Buffer.byteLength(html)});
    response.end(html);
}

// export the function
exports.doCount = do_count;
Make sure to create an object that requires our new counter code:
// a more interesting object, for counting
var counter = require('./counter');
And then set up a route:
    // handle /counter
    else if (request.url === '/counter') {
        counter.doCount(request, response);
    }
Each time you visit http://localhost:9000/counter, you'll get a new number. Note that the counter resets whenever you restart your server.
Generating HTML on the fly is extremely tedious, especially when the HTML is complex. To get around this, we can use a templating engine. We'll focus on EJS, which is powerful but easy to learn (it looks a lot like HTML).
First, install EJS:
npm install ejsWe're going to do this incrementally. Let's start with a very simple template. Create a folder called "templates", and in it, create the file "simple.ejs":
<html>
  <head>
    <title>Simple EJS Templating</title>
  </head>
  <body>
    <h2>Here are 6 dice rolls</h2>
    <ul>
      <% for (i = 0; i < 6; ++i) { %>
        <li>
          Roll #<%= i %> = <%= Math.ceil(6*Math.random()) %>
        </li>
      <% } %>
    </ul>
  </body>
</html>
In this template, the "<% ... %>" tags are used to embed JavaScript into the HTML. Next, let's set up a route to "simple_ejs":
...
// our simple EJS demo
var randomized = require('./simple_ejs');
...
    // handle /simple_ejs
    else if (request.url === '/simple_ejs') {
        simple_ejs.doSimpleEjs(request, response);
    }
And lastly, let's use simple_ejs.js to invoke the EJS engine to produce HTML from our template:
// we need EJS and the filesystem
var ejs = require('ejs');
var fs = require('fs');

// path to the template we're using
var template = './templates/simple.ejs';

exports.doSimpleEjs = function(request, response) {
    // this is not very efficient... it's just a demo.  On each request,
    // we'll re-load the template from disk
    fs.readFile(template, function(err, data) {
        // once we've got the template (as "data"), pass it to EJS to get
        // HTML
        var output = ejs.render(data.toString());
        response.setHeader('Content-type', 'text/html');
        response.end(output);
    });
};
When you visit this site, you should see something like this:
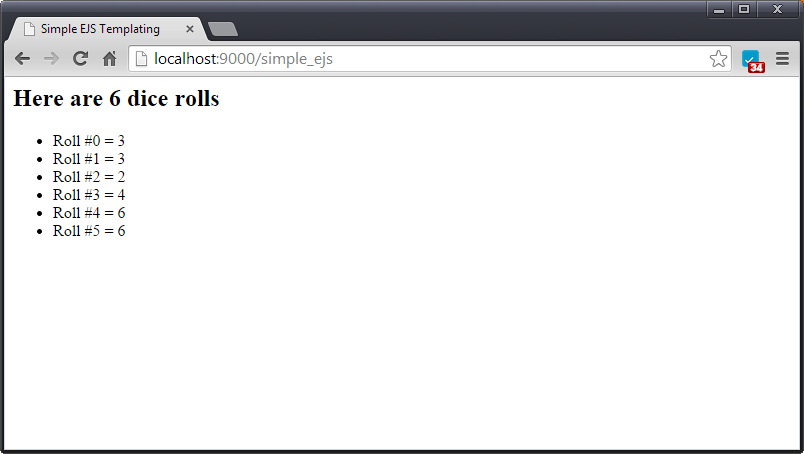
Be sure to also look at the page source (ctrl-u in Chrome). You'll notice that the JavaScript has all been executed on the server, leaving you with pure HTML.
We can pass data to our EJS template, and we can also have JavaScript in the template that runs on the client. Let's try both. Make a new template called "intermediate.ejs":
<html>
  <head>
    <title>Intermediate EJS Templating</title>
    <script>
      function myjs() {
          window.alert("thanks for clicking me");
      }
    </script>
  </head>
  <body>
    <h2>Your Number is <%= value %></h2>
    <% var done = false %>
    <table border="1">
      <tr><th>Color</th><th>Code</th><th>Threshold</th><th>Selected?</th></tr>
      <% for (x=0; x < list.length; ++x) { %>
      <tr>
        <td><%= list[x].color %> </td>
        <td><%= list[x].val %> </td>
        <td><%= list[x].lt %> </td>
        <% if (!done && value <= list[x].lt) { %>
           <td style="background-color:<%= list[x].color %>"> </td>
           <% done = true; %>
        <% } else { %>
           <td> </td>
        <% } %>
      </tr>
      <% } %>
    </table>
    <br />
    <button onclick="myjs()">Click Me!</button>
  </body>
  <script>
    // for the record, here's the json we sent across...
    <% /* note: new syntax for printing eval'd javascript */ %>
    var list = <%- JSON.stringify(list) %>;
    var value = <%- JSON.stringify(value) %>;
  </script>
</html>
Notice how some JavaScript code is inside of <% %> tags, and other code is not. Some of this JavaScript will be sent to the client to run on a button click.
Next, wire up a route:
...
// our intermediate EJS demo
var intermediate_ejs = require('./intermediate_ejs');
...
    // handle /intermediate_ejs
    else if (request.url === '/intermediate_ejs') {
        intermediate_ejs.doIntermediateEjs(request, response);
    }
And lastly, implement intermediate_ejs.js
var ejs = require('ejs');
var fs = require('fs');
var template = './templates/intermediate.ejs';

// for this demo, we'll have an array with three colors, their RGB values,
// and their thresholds.  We'll pick a random number when rendering the
// template, and then EJS will decide how to use the random to render the
// thresholds
var thresholds = [
    {color: 'red',   val:'#FF0000', lt: .33},
    {color: 'green', val:'#00FF00', lt: .66},
    {color: 'blue',  val:'#0000FF', lt: 1}
];

exports.doIntermediateEjs = function(request, response) {
    fs.readFile(template, function(err, data) {
        var output = ejs.render(data.toString(), {list: thresholds, value: Math.random()});
        response.setHeader('Content-type', 'text/html');
        response.end(output);
    });
};
As you can see, we're creating objects on the server, sending them as JSON to the template, using them to produce HTML, and then sending that HTML to the client. We're also using the <%- %> notation in our template to indicate that we want to print the eval'd javascript, instead of its HTML. Be sure to use F12 to enter the Chrome Console so that you can verify that list has the correct value.
It's common to want to interact with data on a web site. One of the most popular ways to do this is the CRUD/REST combination. The main idea is that we'll implement CRUD operations (create, read, update, delete) using the representative state transfer (REST) architectural style.
A REST interface typically maps HTTP POST, GET, PUT, and DELETE verbs to the CRUD commands. The only tricky parts are that we need to be able to GET individual items or the entire list, and doing POST/PUT/DELETE are tricky from a web browser. We'll ultimately use the "curl" program to solve the latter problem, but first, let's write some code. Start by creating a route:
...
// our rest demo
var restdemo = require('./restdemo');
...
    // our REST interface is a bit different, since we can list all without a
    // trailing '/'
    else if ((request.url === '/restdemo') ||
             (request.url.indexOf("/restdemo/") === 0))
    {
        restdemo.doRest(request, response);
    }
We're going to keep things extremely simple for now, so let's say that our data model is going to consist of an array of strings. We'll have a counter for assigning unique IDs, and that's it. For starters, we'll just support POSTing new data and GETting all data. Create restdemo.js:
var url = require('url');

// here's our data model
var items = [];
var counter = 0;

exports.doRest = function(request, response) {
    switch (request.method) {
      // CREATE:
      case 'POST':
        var item = '';
        // asynchronously get the data
        request.setEncoding('utf8');
        request.on('data', function(chunk) {
            item += chunk;
        });
        // when the data is all there, save it
        request.on('end', function() {
            var c = counter++;
            items[c] = item;
            response.end('OK\n');
        });
        break;
      // READ:
      case 'GET':
        if (request.url === "/restdemo") {
            // create a big string with all the entries
            var body = "";
            for (i = 0; i < counter; ++i) {
                body += i + ') ' + items[i] + "<br />\n";
            }
            // send the string
            response.writeHead(200, {'Content-Type': 'text/html; charset="utf-8"',
                                     'Content-Length': Buffer.byteLength(body)});
            response.end(body);
            break;
        }
    }
}
When we visit localhost:9000/restdemo, there isn't anything to show right now. Let's use curl to add some data. From the command prompt, type the following:
curl -d "test1" http://localhost:9000/restdemo/
curl -d "test2" http://localhost:9000/restdemo/
Refreshing the page should now show some data. Let's go ahead and add support for deletion:
    // DELETE
    case 'DELETE':
        // extract the ID to delete.  Note that the slice(10) is to extract
        // /restdemo/ from the url
        var path = url.parse(request.url).pathname;
        var i = parseInt(path.slice(10), 10);
        // detect invalid ids
        if (isNaN(i)) {
            response.statusCode = 400;
            response.end('Invalid item id');
        }
        // forbid double-deletions
        else if (items[i] === null) {
            response.statusCode = 404;
            response.end('Item not found');
        }
        // otherwise delete via null in the given position
        else {
            items[i] = null;
            response.end('OK\n');
        }
        break;
Use the first command below to populate your collection, and the second to remove a specific item. Note that we also test a few bad delete requests.
for p in 1 2 3 4 5 6 7 8 9 10; do curl -d "test$p" http://localhost:9000/restdemo/; done

curl -X DELETE http://localhost:9000/restdemo/2

curl -X DELETE http://localhost:9000/restdemo/2

curl -X DELETE http://localhost:9000/restdemo/

curl -X DELETE http://localhost:9000/restdemo/abc
Now let's add support for updating, via PUT:
    // UPDATE:
    case 'PUT':
        var item = '';
        // asynchronously get the data
        request.setEncoding('utf8');
        request.on('data', function(chunk) {
            item += chunk;
        });
        // when the data is all there, determine the index and do an update
        request.on('end', function() {
            // extract the ID, just like in DELETE
            var path = url.parse(request.url).pathname;
            var i = parseInt(path.slice(10), 10);

            // detect invalid ids
            if (isNaN(i)) {
                response.statusCode = 400;
                response.end('Invalid item id');
            }

            // detect deleted ids
            else if (items[i] === null) {
                response.statusCode = 404;
                response.end('Item not found');
            }

            // update at the given position
            else {
                items[i] = item;
                response.end('OK\n');
            }
        });
        break;
And of course, we'll use curl to test. Be sure to visit the web page between commands to see the state of the collection.
for p in 1 2 3 4 5 6 7 8 9 10; do curl -d "test$p" http://localhost:9000/restdemo/; done

curl -X PUT -d "put test 3" http://localhost:9000/restdemo/4

curl -X DELETE http://localhost:9000/restdemo/4

curl -X PUT -d "put test 3" http://localhost:9000/restdemo/4

curl -X PUT -d "put test 3" http://localhost:9000/restdemo/abc
Finally, let's extend our GET interface to also support GETting individual items:
      // READ:
      case 'GET':
        // get all items
        if (request.url === "/restdemo") {
            // create a big string with all the entries
            var body = "";
            for (i = 0; i < counter; ++i) {
                if (items[i] != null) {
                    body += i + ') ' + items[i] + "<br />\n";
                }
            }
            // send the string
            response.writeHead(200, {'Content-Type': 'text/html; charset="utf-8"',
                                     'Content-Length': Buffer.byteLength(body)});
            response.end(body);
            break;
        }
        // get a specific item
        else {
            // extract the ID.  See DELETE for more info
            var path = url.parse(request.url).pathname;
            var i = parseInt(path.slice(10), 10);
            // detect invalid ids
            if (isNaN(i) || i >= counter) {
                response.statusCode = 400;
                response.end('Invalid item id');
            }

            // forbid access to deleted items
            else if (items[i] === null) {
                response.statusCode = 404;
                response.end('Item not found');
            }

            // otherwise get the item
            else {
                // create a string, then send it
                var body = "";
                body += i + ') ' + items[i] + "<br />\n";
                response.writeHead(200, {'Content-Type': 'text/html; charset="utf-8"',
                                         'Content-Length': Buffer.byteLength(body)});
                response.end(body);

            }
            break;
        }
When testing this code, be sure to attempt to visit non-numeric items, items outside the range, and items that have been deleted.
In a production setting, we would, of course, need to authenticate our users before letting them access the data. We'd want to support queries for ranges of IDs. We'd want to save the collection, so that it didn't reset whenever the server was restarted. And it should allow POSTing and PUTting multiple fields. The next few steps will provide the background for achieving these goals.
Now let's handle a basic HTML form. In this example, we'll have a form with multiple fields, which we'll use to insert entries into a collection. Let's start by making our route:
...
// our html form demo
var formdemo = require('./formdemo');
...
    // HTML form demo
    else if (request.url === '/formdemo') {
        formdemo.doFormDemo(request, response);
    }
We're going to have a collection of items and due dates. To make this work, we'll need an HTML form, so let's make it via an EJS template. Our form will also provide us with a list of everything already in the collection. Remember: this is just a demo, a real collection would need a more complete interface.
Create templates/formdemo.ejs:
<html>
  <head><title>HTML Form Demo</title></head>
  <body>
    <h1>HTML Form Demo</h1>
    <ul>
    <%- items.map(function(item){return '<li>' + item.item + ' : ' + item.due + '</li>'}).join('') %>
    </ul>
    <form method="post" action="/formdemo">
      <p>Item: <input type="text" name="item" /></p>
      <p>Due: <input type="text" name="due" /></p>
      <p><input type="submit" value="Add" /></p>
    </form>
  </body>
</html>
And then we can make formdemo.js:
// we need EJS and the filesystem
var ejs = require('ejs');
var fs = require('fs');

// we also need querystring, to handle parsing the request
var querystring = require('querystring');

// path to the template we're using
var template = './templates/formdemo.ejs';

// on any GET, just show the form, and on any POST, try to add to the
// collection
exports.doFormDemo = function(request, response) {
    switch (request.method) {
    case 'GET':
        show(response);
        break;
    case 'POST':
        add(request, response);
        break;
    default:
        bad_request(response);
    }
}

// our collection of item/due-date pairs
var collection = [];

// we show the collection by rendering the template, passing in the whole
// collection
function show(response) {
    fs.readFile(template, function(err, data) {
        var output = ejs.render(data.toString(), {items : collection});
        response.setHeader('Content-type', 'text/html');
        response.end(output);
    });
};

// on a bad request, print an error
function bad_request(response) {
    response.statusCode = 400;
    response.setHeader('Content-Type:', 'text/plain');
    response.end('Bad Request');
}

// handle a post:
function add(request, response) {
    // we asynchronously get all of the data from the request's query string
    var qs = '';
    request.setEncoding('utf8');
    request.on('data', function(chunk) { qs += chunk; });
    // when we have the whole query string, parse it and push its fields into
    // the collection
    request.on('end', function() {
        var obj = querystring.parse(qs);
        collection.push({item: obj.item, due: obj.due});
        // finish by showing the page, with the new data
        show(response);
    });
}
While hardly a full-featured web form, hopefully you can see how to build out the additional features your app might need.
Our previous HTML Form example used GET for sending small amounts of data via the query string. What if we wanted to send a lot of data (such as a file)? To handle that, we need to use POST instead.
We will use the formidable package to make a form that can be used to upload a file. Let's start by making a folder to store our uploads. It should be at the same level as the templates folder:
mkdir uploadsNext, install the formidable package:
npm install formidableWith that groundwork out of the way, set up a route for our new path. We're going to do things a little bit different here: our upload form itself will be a static HTML file called public/fileupload.html:
<html>
  <head><title>Upload a file</title></head>
  <body>
    <form method="post" action="/fileupload" enctype="multipart/form-data">
      <input type="text" name="name">
      <input type="file" name="file">
      <input type="submit" value="Upload">
    </form>
  </body>
</html>
Next, set up a route:
...
// our html file upload demo
var fileupload = require('./fileupload');
...
    // HTML file upload route, for after the form is submitted
    else if (request.url === '/fileupload') {
        fileupload.doFileUpload(request, response);
    }
Now it's time to provide the code for handling the form. While our form only supports a single file, the code below can handle multiple files from a single form. However, we are not 100% safe here: we timestamp the file as it comes in, but since we use the original file name, it could be possible for someone to send two files with the same name, and for the timestamps to be the same, in which case only one file would be saved. In a real system, you probably wouldn't use the original file name anyway, and this bug is OK for our demo.
// use formidable to handle form data
var formidable = require('formidable');
// get the join function from the path module
var join = require('path').join;
// we also need the filesystem
var fs = require('fs');

// generate an error for any request other than a POST
exports.doFileUpload = function(request, response) {
  switch (request.method) {
    case 'POST':
      handle_upload(request, response);
      break;
  default:
      bad_request(response);
  }
}

// on a bad request, print an error
function bad_request(request, response) {
    response.statusCode = 400;
    response.setHeader('Content-Type:', 'text/plain');
    response.end('Bad Request');
}

// handle a form submission (POST)
function handle_upload(request, response) {
    // check if we are working with form data from a multipart form
    var type = request.headers['content-type'] || '';
    var bad_type = (0 != type.indexOf('multipart/form-data'));
    if (bad_type) {
        bad_request(request, response);
        return;
    }

    // get the form
    var form = new formidable.IncomingForm();

    // the output name
    var fname = false;
    // the path where the file is temporarily stored
    var path = false;
    // this is for storing the extra field from the HTML form
    var name = "";

    // when any form field is parsed, formidable calls this
    form.on('field', function(field, value) {
        // 'name' is the /name/ of the HTML /input/
        if (field === 'name') {
            name = value;
        }
    });

    // when any file is parsed, formidable calls this
    form.on('file', function(name, file) {
        if (name === 'file') { // 'file' is the /name/ of the HTML /input/
            // During development, it's nice to see file
            // console.log(file);

            // get the path where the file was saved... it'll be some temp
            // location
            path = file['path'];
            // create the desired path for the file.  Note that we preserve
            // the original file name, which we get from file['name'], but we
            // append it with a timestamp
            fname = join(__dirname, '/uploads/' + file['name']) + Date.now();
        }
    });

    // when the form is done being parsed, formidable calls this
    form.parse(request, function(err, fields, files) {
        // move the file to the desired location
        console.log("attempting rename from " + path + " to " + fname);
        fs.rename(path, fname, function(err) {
            if (err) { response.end('error!'); }
            else     { response.end('upload complete'); }
        });
    });
}
We are not going to make it possible to view the submitted file over the web, though it shouldn't be too hard for you to figure out how to add that feature.
So far, we've been doing a lot of manual coding to get everything to work. While it's not hard to get these things right, it's still tedious. Fortunately, there are frameworks to make this so much simpler. In this step, we're going to use express.js to create our site. It will handle much of the routing and other tricky stuff, so that we don't have to.
Our first step is to install express and the express-generator tool:
npm install -g express express-generatorNext, let's use the express generator tool to create the basic shell for our website. We're going to use the "-e" flag to indicate that we want to use EJS as our templating engine. This will create a new directory, in which we will find everything that express created:
express -e express_demo
cd express_demo
npm install
DEBUG=express_demo ./bin/www
By default, express runs its web server on port 3000. Once you've run the last command above, you should be able to see your site at http://localhost:3000:
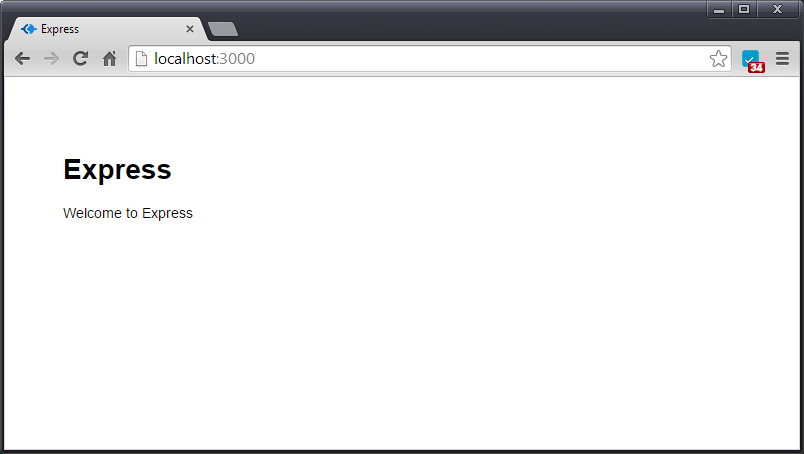
There's an awful lot that just happened to produce our underwhelming website. Let's take a look at our directory listing:
- app.js - The main entry point for the application. There isn't much here.
- bin/ - This folder typically just holds a single Node.js script for starting the application. Note that the port your application uses can be overridden through an environment variable.
- node_modules/ - This is where express puts all the packages for your app. Be sure to add this to your .gitignore!
- package.json - This file stores metadata used by express to configure and reconfigure your application.
- public - Everything in this folder and its children is statically served. There are "images", "javascripts", and "stylesheets" subfolders.
- routes - Every route that you define will correspond to a .js file in this folder.
- views - EJS templates go here.
The express routes are very powerful, and make RESTful interfaces much easier to implement. In the next step of this tutorial, we'll use express along with mongodb to provide persistent storage for a REST collection.
We're not going to be too worried about making a highly enjoyable website here. Instead we are going to focus on making a REST API that is backed by MongoDB. The way to think about this is that you're probably going to have a rich client interface that uses AJAX to interact with your API. In this step, we're just going to make the API, and verify that it interacts correctly.
Naturally, the first step is going to be installing MongoDB. MongoDB does not come with a GUI, so you might want to install a GUI tool along with MongoDB, so that you can explore your data more easily. Once you've got MongoDB set up, you can run it by typing 'mongod --dbpath ...', where the --dbpath parameter is used to indicate where MongoDB should store your -- data. For our sample application, we'll put the data in a folder of the web app.
mkdir data
mongod --dbpath ./data/
You should receive a message indicating that mongod is listening for connections on port 27017.
While you should learn about MongoDB on your own, it's worth noting that 'save' is the function for creating entries; we can read and query with 'find', 'findById', and 'findOne'; we can update with 'update', 'findByIdAndUpdate', and 'findOneAndUpdate'; and we can remove with 'remove', 'findByIdAndRemove', and 'findOneAndRemove'.
The easiest way to use MongoDB in Node.js is with the mongoose package. First, install it. When you install it, the "--save" option will cause your package.json file to be updated:
npm install mongoose --saveRemember: you should list node_modules/ in your .gitignore!
As we move into the next step, it's going to be important to understand a little bit about how Node.js works. Specifically, when we 'require' a module, node caches the result. This means that we can use 'require' to get a database object, and then we can open a connection with that object. In another file, we can 'require' the same database object, and we'll get the already-configured object.
Note: this is a good thing. It means we can create a connection to the database before the server receives any requests, instead of making the connection on demand when the first request comes in.
So, with that said, let's go ahead and create a connection to MongoDB from inside of app.js. You should place this code early in the file (i.e., before the call to express()).
var mongoose = require('mongoose');
mongoose.connect('mongodb://localhost/mongoApp', function(err) {
    if(err) {
        console.log('error connecting to MongoDB', err);
    } else {
        console.log('connected to MongoDB');
    }
});
The above code should create a connection to MongoDB before the app is fully loaded. The connection will use a database called "mongoApp". When you start node (remember: use ./bin/www), you should see a message indicating that your connection to MongoDB was created successfully.
Next, we're going to create a Schema to describe the documents stored in this database. Our API is going to provide a way of storing ideas that we've had. Create a folder called models, and create Idea.js:
// get a mongoose object.  Remember that it will already be connected to our
// database, since we configured it in app.js.
var mongoose = require('mongoose');

// This is the schema for our documents.  Valid types are String, Boolean,
// Date, Array, Number, ObjectId, Mixed, and Buffer.  Be sure to read the
// mongoose.js documentation for more information.
var IdeaSchema = new mongoose.Schema({
    title: String, // a title for this idea
    isgood: Boolean, // true if it's a good idea
    details: String, // more details about this idea
    created_at:{ type: Date, default: Date.now }, // time of creation
    updated_at: { type: Date, default: Date.now }, // time of last update
});

// make this model visible, so that it can be used from our API code
module.exports = mongoose.model('Idea', IdeaSchema);
Our goal is to have our api provide the following functionality: For the /ideas/ route, we want to allow POSTing new ideas, and GETting the entire list. For specific /ideas/xxx routes, we want to allow GETting the specific idea, PUTting updates, or DELETing ideas.
Express assumes, by default, that there will be a "users" route that looks a heck of a lot like what we just described. In fact, there's alread a routes/users.js file! The /users/ route doesn't do anything interesting right now, so let's move it to /ideas/, and then get to work on it. First, rename users.js to ideas.js:
mv routes/users.js routes/ideas.jsNext, replace the 'users' route with an 'ideas' route in app.js:
// this was "var users = require('./routes/users');"
var ideas = require('./routes/ideas');
...
// this was "app.use('/users', users);"
app.use('/ideas', ideas);
And now we can start modifying routes/ideas.js to add the functionality we want. Let's start by returning JSON of the entire listing, in response to a GET for /ideas/.
// get the express router, so that we can configure our paths easily
var express = require('express');
var router = express.Router();

// get the model for our database
var Idea = require('../models/Idea.js');

// this is for GETting all users
router.get('/', function(req, res, next) {
    Idea.find(function(err, ideas) {
        if (err) return next(err);
        res.json(ideas);
    });
});

// make the routes visible
module.exports = router;
Next, let's support inserting new data. Add a 'post' method to the router:
// this is for POSTing new data
router.post('/', function(req, res, next) {
    Idea.create(req.body, function (err, idea) {
        if (err) return next(err);
        res.json(idea);
    });
});
Let's test this out, using curl. Make sure you make the same choices about single and double quotes as in the following example:
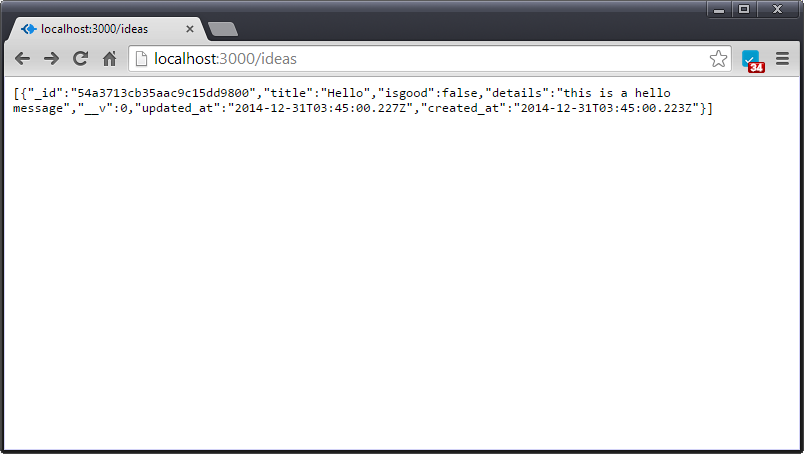
curl -H "Content-Type: application/json" -d '{"title": "Hello",
"isgood": "false", "details": "this is a hello message"}' http://localhost:3000/ideas/
If we revisit the /ideas/ page, we should see our new entry in JSON format. Note that we are returning a JSON array.
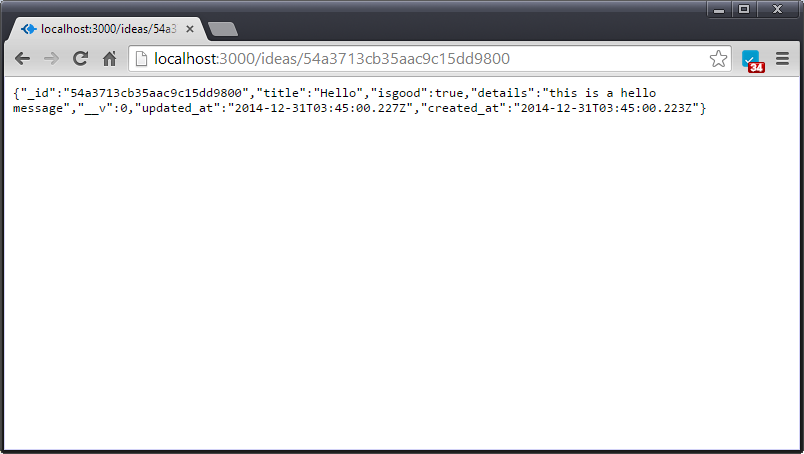
Now let's provide a way of getting individual items. We know that MongoDB has a findById function, so let's go ahead and use it. We'll also use express's advanced routing to GET by id:
// express uses the ':id' route to indicate that we can GET a specific item
router.get('/:id', function(req, res, next) {
    Idea.findById(req.params.id, function(err, idea) {
        if (err) return next(err);
        res.json(idea);
    });
});
To test this, create a path based on one of the Ids that is returned when we view the entire list. Based on the above screenshot, we could test our new route by visiting http://localhost:3000/ideas/54a3713cb35aac9c15dd9800.
Next, let's implement PUT:
// this is for PUTting an update
router.put('/:id', function(req, res, next) {
    Idea.findByIdAndUpdate(req.params.id, req.body, function (err, idea) {
        if (err) return next(err);
        res.json(idea);
    });
});
We can test it using curl:
$ curl -XPUT -H "Content-Type: application/json"
-d '{"isgood": "true"}' http://localhost:3000/ideas/54a3713cb35aac9c15dd9800
In the result, we see that the special created_at and updated_at fields behave as we expect, and that the fields we specified have been changed:
Of course, it's really tedious to use curl like this. Consider using JavaScript instead. Remember... Node.js isn't just for web sites. It's a full command-line JavaScript interface! Create adddata.js:
// connect to mongoose
var mongoose = require('mongoose');
mongoose.connect('mongodb://localhost/mongoApp', function(err) {
    if(err) {
        console.log('error connecting to MongoDB', err);
    } else {
        console.log('connected to MongoDB');

        // get the model for our database
        var Idea = require('./models/Idea.js');

        // create some data
        for (var i = 0; i < 10; ++i) {
            var d = {
                title: "item"+i,
                isgood: "false",
                details: "this item is number " + i + " of our auto-generated items",
            }
            Idea.create(d);
            console.log("created item #" + i);
        }
        process.exit(code=0);
    }
});
When making unit tests, this technique will afford an easy way to quickly populate your database. It's also a good way to make sure that when your professor (hint hint) tests your code, the database is in an appropriate state.
Finally, let's implement DELETE:
// this is for DELETEs
router.delete('/:id', function(req, res, next) {
    Idea.findByIdAndRemove(req.params.id, req.body, function (err, idea) {
        if (err) return next(err);
        res.json(idea);
    });
});
We can test it using curl:
curl -XDELETE http://localhost:3000/ideas/54a3713cb35aac9c15dd9800There is much more that we can do with MongoDB (remember those functions listed at the beginning of this step?). We can also use regular expressions in our queries, and we can use "where" functions on results of find() calls, to chain queries. But at least we've covered the basics. For more information, you should read the mongoose.js guide.
Thus far, you might find yourself thinking that we've been re-creating the wheel... after all, the previous steps are all things that can be done in PHP, or Rails, or any number of other frameworks or platforms. Now we're going to move on to a place where Node.js really shines: real-time webapps.
The socket.io package makes it easy to implement a chatroom application. Why are we going to focus on a chatroom? Quite simply, because if you understand chatrooms, then you understand how to push JSON to the server in response to UI events on a web page, and you understand how to broadcast events from the server back to web pages in real time. You can use the chatroom pattern as the starting point for any interactive application.
To get started, we'll need socket.io. Combining socket.io with express can be tricky (express-io should make it easier), so we'll skip express for this step. Start with a configuration like the one we had at the end of step 12, and install the socket.io package:
npm install socket.ioFirst, let's create the HTML page that will serve as the basis of our chat program. Save the following code as public/chat.html:
<!doctype html>
<html>
  <head>
    <title>Chat</title>
    <link rel='stylesheet' href='/style.css'></link>
  </head>

  <body>
    <div id='content'>
      <div id='messages'></div>
      <form id='send-form'>
        <input id='send-message' />
        <input id='send-button' type='submit' value='Send'/>

        <div id='help'>
          Chat commands:
          <ul>
            <li>Change nickname: <code>/nick [username]</code></li>
          </ul>
        </div>
      </form>
    </div>

    <script src='/socket.io/socket.io.js' type='text/javascript'></script>
    <script src='http://code.jquery.com/jquery-1.8.0.min.js' type='text/javascript'></script>
    <script src='/chat.js' type='text/javascript'></script>
    <script src='/chat_ui.js' type='text/javascript'></script>

  </body>
</html>
Notice that we include socket.io.js. Node.js and socket.io provide this for us, and it gives us a bidirectional communication channel with the server. We are also using JQuery, which makes it easier to manipulate HTML elements, and two JavaScript files that we will have to provide, one for the object that communicates with the server, and the other for using JQuery to implement the UI.
Next, create a stylesheet at public/style.css:
body {
    padding: 50px;
    font: 14px "Lucida Grande", Helvetica, Arial, sans-serif;
}

a {
    color: #00B7FF;
}

#content {
    width: 800px;
    margin-left: auto;
    margin-right: auto;
}

#messages {
    width: 690px;
    height: 300px;
    overflow: auto;
    background-color: #eee;
    margin-bottom: 1em;
    margin-right: 10px;
}

#send-message {
    width: 700px;
    margin-bottom: 1em;
    margin-right: 1em;
}

#help {
    font: 10px Helvetica Arial, sans-serif;
}
Our chat system will work by installing a handler, so that on any click of the "Send" button, the message will be added to the chat window, and also sent up to the server. From there, it will be sent down to all browsers.
We're also going to support a "nickname" feature, so that users can come up with unique names. This is really more to show how to implement additional commands. You could use it to create different rooms, set their permissions, etc.
Let's start with the UI code. This goes in public/chat_ui.js:
// create a socket that uses socket.io and is connected to the server
var socket = io.connect();

// handle 'submit' button
function processUserInput(chatApp, socket) {
    // get the message to send
    var message = $('#send-message').val();

    // if the message starts with '/', assume that it is a system command
    if (message.charAt(0) == '/') {
        // send the message to the Chat Server
        var systemMessage = chatApp.processCommand(message);
        // if we got a reply, display the reply in an italics div
        if (systemMessage) {
            $('#messages').append($('<div></div>').html('<i>' + systemMessage + '</i>'));
        }
    }
    // the normal case is that we have a non-system-command message
    else {
        // send the message to the Chat Server
        chatApp.sendMessage(message);
        // put the message in a div in the output window, and adjust scrolling
        $('#messages').append($('<div></div>').text(message));
        $('#messages').scrollTop($('#messages').prop('scrollHeight'));
    }
    // clear the message input box
    $('#send-message').val('');
}

// Do this when the document is fully loaded, to configure the interface
$(document).ready(function() {
    // make a Chat object, for managing communication with the server
    var chatApp = new Chat(socket);

    // if we tried to change our /nick, then we'll get a nameResult message
    // back.  This handles the message
    socket.on('nameResult', function(result) {
        var message;

        // create text for when the request succeeded
        if (result.success) {
            message = 'You are now known as ' + result.name + '.';
        }
        // create text for when the request failed
        else {
            message = result.message;
        }
        $('#messages').append($('<div></div>').html('<i>' + message + '</i>'));
    });

    // whenever we get a non-nameResult message from the socket, we append it
    // to the message log
    socket.on('message', function(message) {
        var newElement = $('<div></div>').text(message.text);
        $('#messages').append(newElement);
    });

    // put the focus on the region where the user types a message
    $('#send-message').focus();

    // set the action for the click button
    $('#send-form').submit(function() {
        processUserInput(chatApp);
        return false;
    });
});
Now we'll create our chat.js file, which has the chat object in it. This is a bit of overkill, but it abstracts away the communication a little bit, instead of combining it with all the JQuery UI code.
// our Chat object has one field: a socket
var Chat = function(socket) {
    this.socket = socket;
};

// the UI routes us here when the submit button is presed and the text didn't
// start with '/'.  We take the message, turn it into JSON, and send it on
// the socket
Chat.prototype.sendMessage = function(text) {
    var message = {
        text: text
    };
    this.socket.emit('message', message);
};

// the UI routes us here when the submit button is pressed and the text did
// start with '/'.
Chat.prototype.processCommand = function(command) {
    // split the message, figure out what the command (first word) is
    var words = command.split(' ');
    var command = words[0].substring(1, words[0].length).toLowerCase();

    switch (command) {
      // if it's a nickname change, send the desired nickname, return false
      // to indicate that there will be no output
      case 'nick':
        words.shift();
        var name = words.join(' ');
        this.socket.emit('nameAttempt', name);
        return false;
      // otherwise, it's an unknown request, so return some text to display
      default:
          return 'Unrecognized command.';
    };
};
We don't actually have a route here, but we do need to connect socket.io to the HTTP server. We do this by putting the following code at the bottom of our server.js file:
// set up our chat server, connect it to the server
var chatServer = require('./chatserver');
chatServer.listen(server);
Finally, let's create chatserver.js:
// pull in socket.io
var socketio = require('socket.io');

// we use this to assign unique names when new people join
var guestNumber = 1;

// for name lookup: get a name from a socket's id
var nickNames = {};

// the public method of this file starts listening for new socket requests
exports.listen = function(server) {
    // listen on the socket
    var io = socketio.listen(server);

    // when a new connection is created, run this code
    io.sockets.on('connection', function(socket) {
        // assign a unique name
        var name = 'Guest' + guestNumber++;
        nickNames[socket.id] = name;
        // send name to user
        socket.emit('nameResult', {success: true, name: name});

        // socket.io has a concept of rooms, which we don't use.  Everyone is
        // in the room called "room".  Add this user to the room, and tell
        // everyone.  Note that broadcast sends to everyone except the
        // sender.
        socket.join("room");
        socket.broadcast.to("room").emit('message', {
            text: nickNames[socket.id] + ' has joined.'
        });

        // set a handler so that when this user sends a message, it gets
        // broadcast to the whole room
        socket.on('message', function(message) {
            socket.broadcast.to("room").emit('message', {
                text: nickNames[socket.id] + ': ' + message.text
            });
        });

        // set a handler for requests to change this user's name
        socket.on('nameAttempt', function(name) {
            // forbid names that start with guest
            if (name.indexOf('Guest') == 0) {
                // send failure to requestor
                socket.emit('nameResult', {
                    success: false,
                    message: 'Names cannot begin with "Guest".'
                });
                return;
            }

            // we'll be lazy: if you give a name that someone else has, we'll
            // let it go.
            var oldName = nickNames[socket.id];
            nickNames[socket.id] = name;
            // send confirmation to requestor
            socket.emit('nameResult', {success: true, name: name});
            // tell everyone else
            socket.broadcast.to("room").emit('message', {
                text: oldName + ' is now ' + name + '.'});
        });

        // handle disconnection by deleting the name
        socket.on('disconnect', function() {
            delete nickNames[socket.id];
        });
    });
};
Start your server, then open a few browser tabs and you should be able to chat across tabs!
To make sure you understand everything we've covered in this tutorial, you should try to do the following projects:
- Use express.io to build an Express.js+Socket.io chat server
- Integrate all of the steps of this tutorial into a single express app
- Learn how to use nodemon so that your app auto-restarts when you change the code
- Use passport.js to add OAuth and HTTPS authentication to your web app.